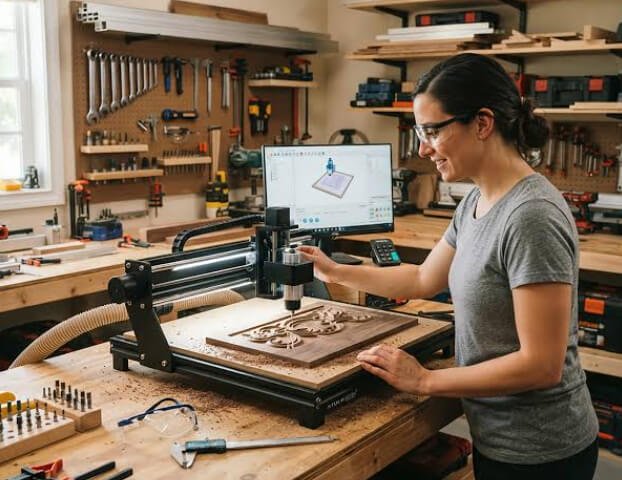
Building a functional home workshop used to mean sacrificing an entire garage or basement to flying sawdust, loud motor noise, and hazardous fumes. Today, the rise of desktop fabrication tools has transformed how hobbyists, product designers, and small business owners approach home manufacturing.
By combining an enclosed laser engraver with an enclosed CNC router, you can establish a clean, multi-material desktop factory capable of producing professional-grade products right from your workbench.
The Power of a Hybrid Workshop
While both machines process materials using digital vector files, they perform entirely different manufacturing roles:
┌──> Enclosed Laser ─────> Fast 2D Cutting, Vector Etching & Surface Branding
[Digital CAD/CAM Design] ─┤
└──> Enclosed CNC Router ──> Deep 3D Carving, Structural Joinery & Milling
- Enclosed Diode Laser: Operates through non-contact thermal processing. It excels at fast vector cutting of thin sheet goods, intricate leather scoring, paper crafting, and high-detail raster photo engraving.
- Enclosed CNC Router: Operates via physical subtractive carving. It cuts through thick hardwood blocks, mills non-ferrous metals like aluminum, and carves 3D reliefs, bowls, and complex joinery.
Combining both tools allows you to handle structural shaping with the router and apply high-contrast branding, logos, or delicate surface patterns with the laser.
Why Enclosures Matter for Home Fabrication
Operating high-power fabrication tools in a residential space introduces three main challenges: dust, noise, and safety. Fully enclosed machine designs address all three:
| Workshop Challenge | Open-Frame Setup Risk | Enclosed Machine Solution |
| Fine Dust & Debris | Wood dust spreads across the room, clogging electronics | Fully contains chips and wood dust for easy vacuum cleanup |
| Acoustic Noise | Spindle motors and high-RPM cuts generate 85dB+ noise | Insulated enclosure panels significantly dampen operational sound |
| Optical & Mechanical Safety | Stray laser reflections and flying broken bit fragments | Filtered viewing windows block laser light and contain debris |
| Smoke & Fumes | Unfiltered smoke drifts into living quarters | Direct exhaust ports channel fumes out a window or into an air filter |
Streamlining Your Digital Workflow
Modern fabrication equipment integrates cleanly with standardized software packages to streamline production from concept to finished part:
[CAD / Design Software] ──> [LightBurn or CAM G-Code] ──> [Enclosed Hardware] ──> Finished Product
1. Optical Precision & Software Control
When operating an enclosed laser system, software compatibility is critical for controlling speed, power, and layer ordering. Selecting a reliable LightBurn compatible laser gives makers access to industry-standard vector manipulation, raster photo engraving controls, and precise speed/power parameter tuning.
2. Automated Subtractive Machining
For complex CNC milling operations involving multiple bit sizes (such as using a large end mill for roughing out material followed by a tapered ball nose for 3D relief detailing), manual bit changes can slow down production. Operating an advanced setup featuring an automatic tool changer or an automated tool-height sensor eliminates manual zero-point re-calibrations, allowing for smooth, uninterrupted machining runs.
Practical Project Ideas for a Dual-Machine Workshop
Combining subtractive mechanical carving with non-contact laser etching opens up diverse product opportunities:
- Custom Wooden Timepieces: Use the CNC router to carve thick hardwood clock housings and gear pockets, then use the laser engraver to mark precise dial indices and custom logos.
- Layered Acrylic Signage: Route thick mounting bases and brass standoffs on the CNC router, while laser-cutting crisp acrylic lettering and faceplates.
- Bespoke Furniture & Inlays: Mill precise mortise-and-tenon joints and pocket recesses on the CNC router, then cut matching wood veneer inlays with the laser engraver for a perfect fit.
See also: From New York to Kolkata: What Travelers Should Know Before Booking a Flight
Final Tips for Setting Up Your Workshop Space
To maximize productivity and keep your home workshop running safely:
- Plan Your Ventilation: Route your laser’s active exhaust ducting directly to an outside window or connect it to an inline HEPA/activated carbon filtration unit.
- Dedicated Power Distribution: Ensure high-draw components (like CNC spindles and shop vacuums) are spread across stable electrical circuits to prevent tripping breakers.
- Organize Stock & Bits: Keep dedicated tooling racks for end mills, collets, and protective safety glasses near your machines to keep setup times minimal.
Integrating enclosed laser and CNC platforms gives home makers a quiet, safe, and professional fabrication environment capable of bringing complex multi-material designs to life.
